Mục lục
3. Chạy ứng dụng bằng terminal
1. Setup
1.1. Tạo file requirements.txt
-
requirements.txtlà file chứa các thư viện cần thiết cho project -
Tạo file từ các thư viện đã cài đặt:
pip freeze > requirements.txt- Cài đặt thư viện từ file
requirements.txt(khi mới clone project):
pip install -r requirements.txt1.2. Tạo environment cho project
- Tạo folder env
python2
pip install --upgrade pip==20.3.4
pip install virtualenv && virtualenv .env
python3
python -m venv env- Chọn chương trình thông dịch:
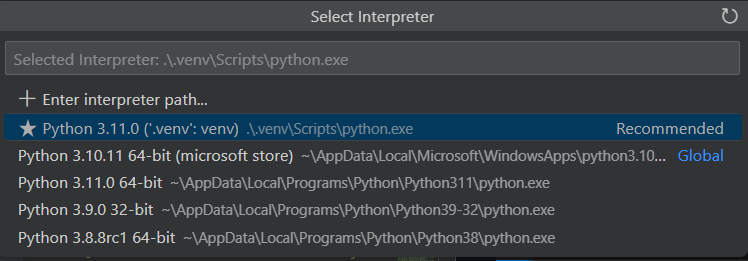
Ctrl+Shift+P>Python: Select Interpreter
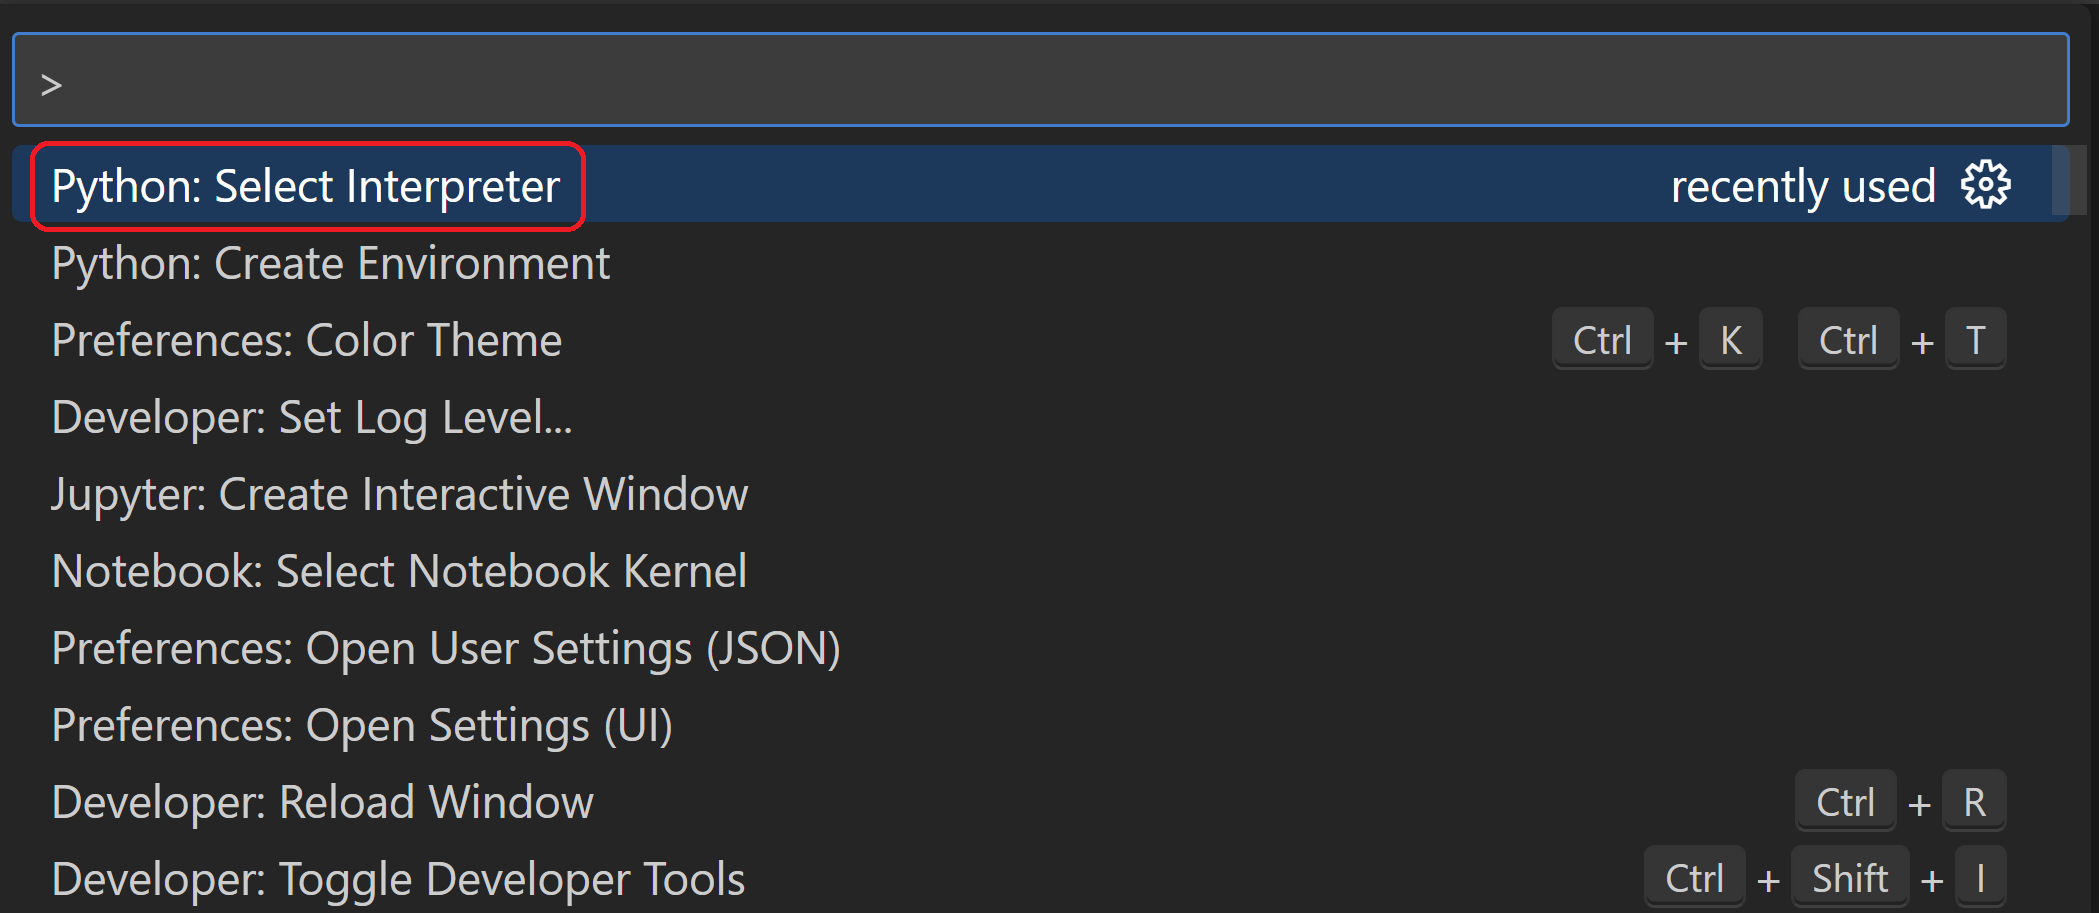
Chọn file thông dịch trong folder env
- Chạy lệnh sau để sử dụng các lệnh
python,piptrong env:
env\Scripts\activate- Update
piptrong env:
python -m pip install --upgrade pip- Cài đặt
flask
pip install flask2. Tạo web app sử dụng Flask
2.1. Tạo file app.py
from flask import Flask
app = Flask(__name__)

@app.route("/")
def home():
    return "Hello, Flask!"
2.2. Chạy app
python -m flask run2.3. Chạy app ở chế độ debug
Chọn Run and Debug trên VS code, chọn create a launch.json file, cấu hình Flask. VS code sẽ tạo file launch.json:
{
  // Use IntelliSense to learn about possible attributes.
  // Hover to view descriptions of existing attributes.
  // For more information, visit: https://go.microsoft.com/fwlink/?linkid=830387
  "version": "0.2.0",
  "configurations": [
    {
      "name": "Python: Flask",
      "type": "python",
      "request": "launch",
      "module": "flask",
      "env": {
        "FLASK_APP": "app.py",
        "FLASK_ENV": "development",
        "FLASK_DEBUG": "0"
      },
      "args": ["run", "--no-debugger"],
      "jinja": true
    }
  ]
}
Bấm F5 để debug app
3. Chạy ứng dụng bằng terminal
On Linux and macOS, use export set FLASK_APP=webapp; on Windows use set FLASK_APP=webapp
python -m flask runCó thể lưu trữ các biến môi trường trong file .flaskenv như sau:
pip3 install python-dotenvFile .flaskenv
FLASK_APP = myblog.py4. Debug
Có các cách debug sau:
-
Debug trực tiếp từ VS code: chọn view debug trên VScode, chọn
create a launch.json file, tạo file launch.json theo hướng dẫn{ "name": "Python: Flask", "type": "python", "request": "launch", "module": "flask", "env": { "FLASK_APP": "app.py", "FLASK_ENV": "development", "FLASK_DEBUG": "0" }, "args": [ "run", "--no-debugger", "--no-reload" ], "jinja": true }, -
Debug từ bằng docker container
-
Mở
Command Palette(Ctrl+Shift+PhoặcF1), chạy lệnhdocker add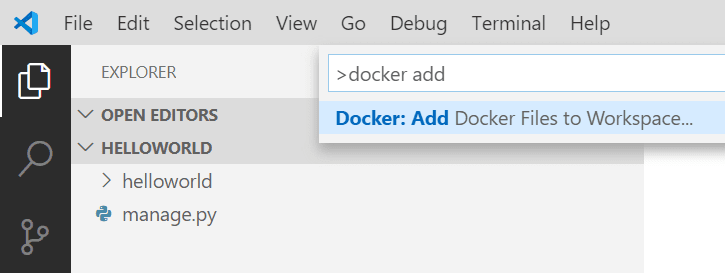
Làm theo các bước hướng dẫn. Sau khi xong chọn chế độ debug bằng
Docker: ... -
-
Debug bằng docker-compose:
-
Tạo Dockerfile từ các bước như trên, nội dung file như sau:
# For more information, please refer to https://aka.ms/vscode-docker-python

FROM python:3.8-slim-buster as base

WORKDIR /app
COPY ./src /app

# Install pip requirements
COPY requirements.txt .
RUN python -m pip install -r requirements.txt

ENV FLASK_APP=webapp.py

#########DEBUGGER###########

FROM base as debug
RUN pip install ptvsd

# WORKDIR /app

CMD python -m ptvsd --host 0.0.0.0 --port 5678 --wait --multiprocess -m flask run -h 0.0.0 -p 5000

#########PROD###########
FROM base as prod

CMD flask run -h 0.0.0 -p 5000
-